How We First Setup Our Shelves
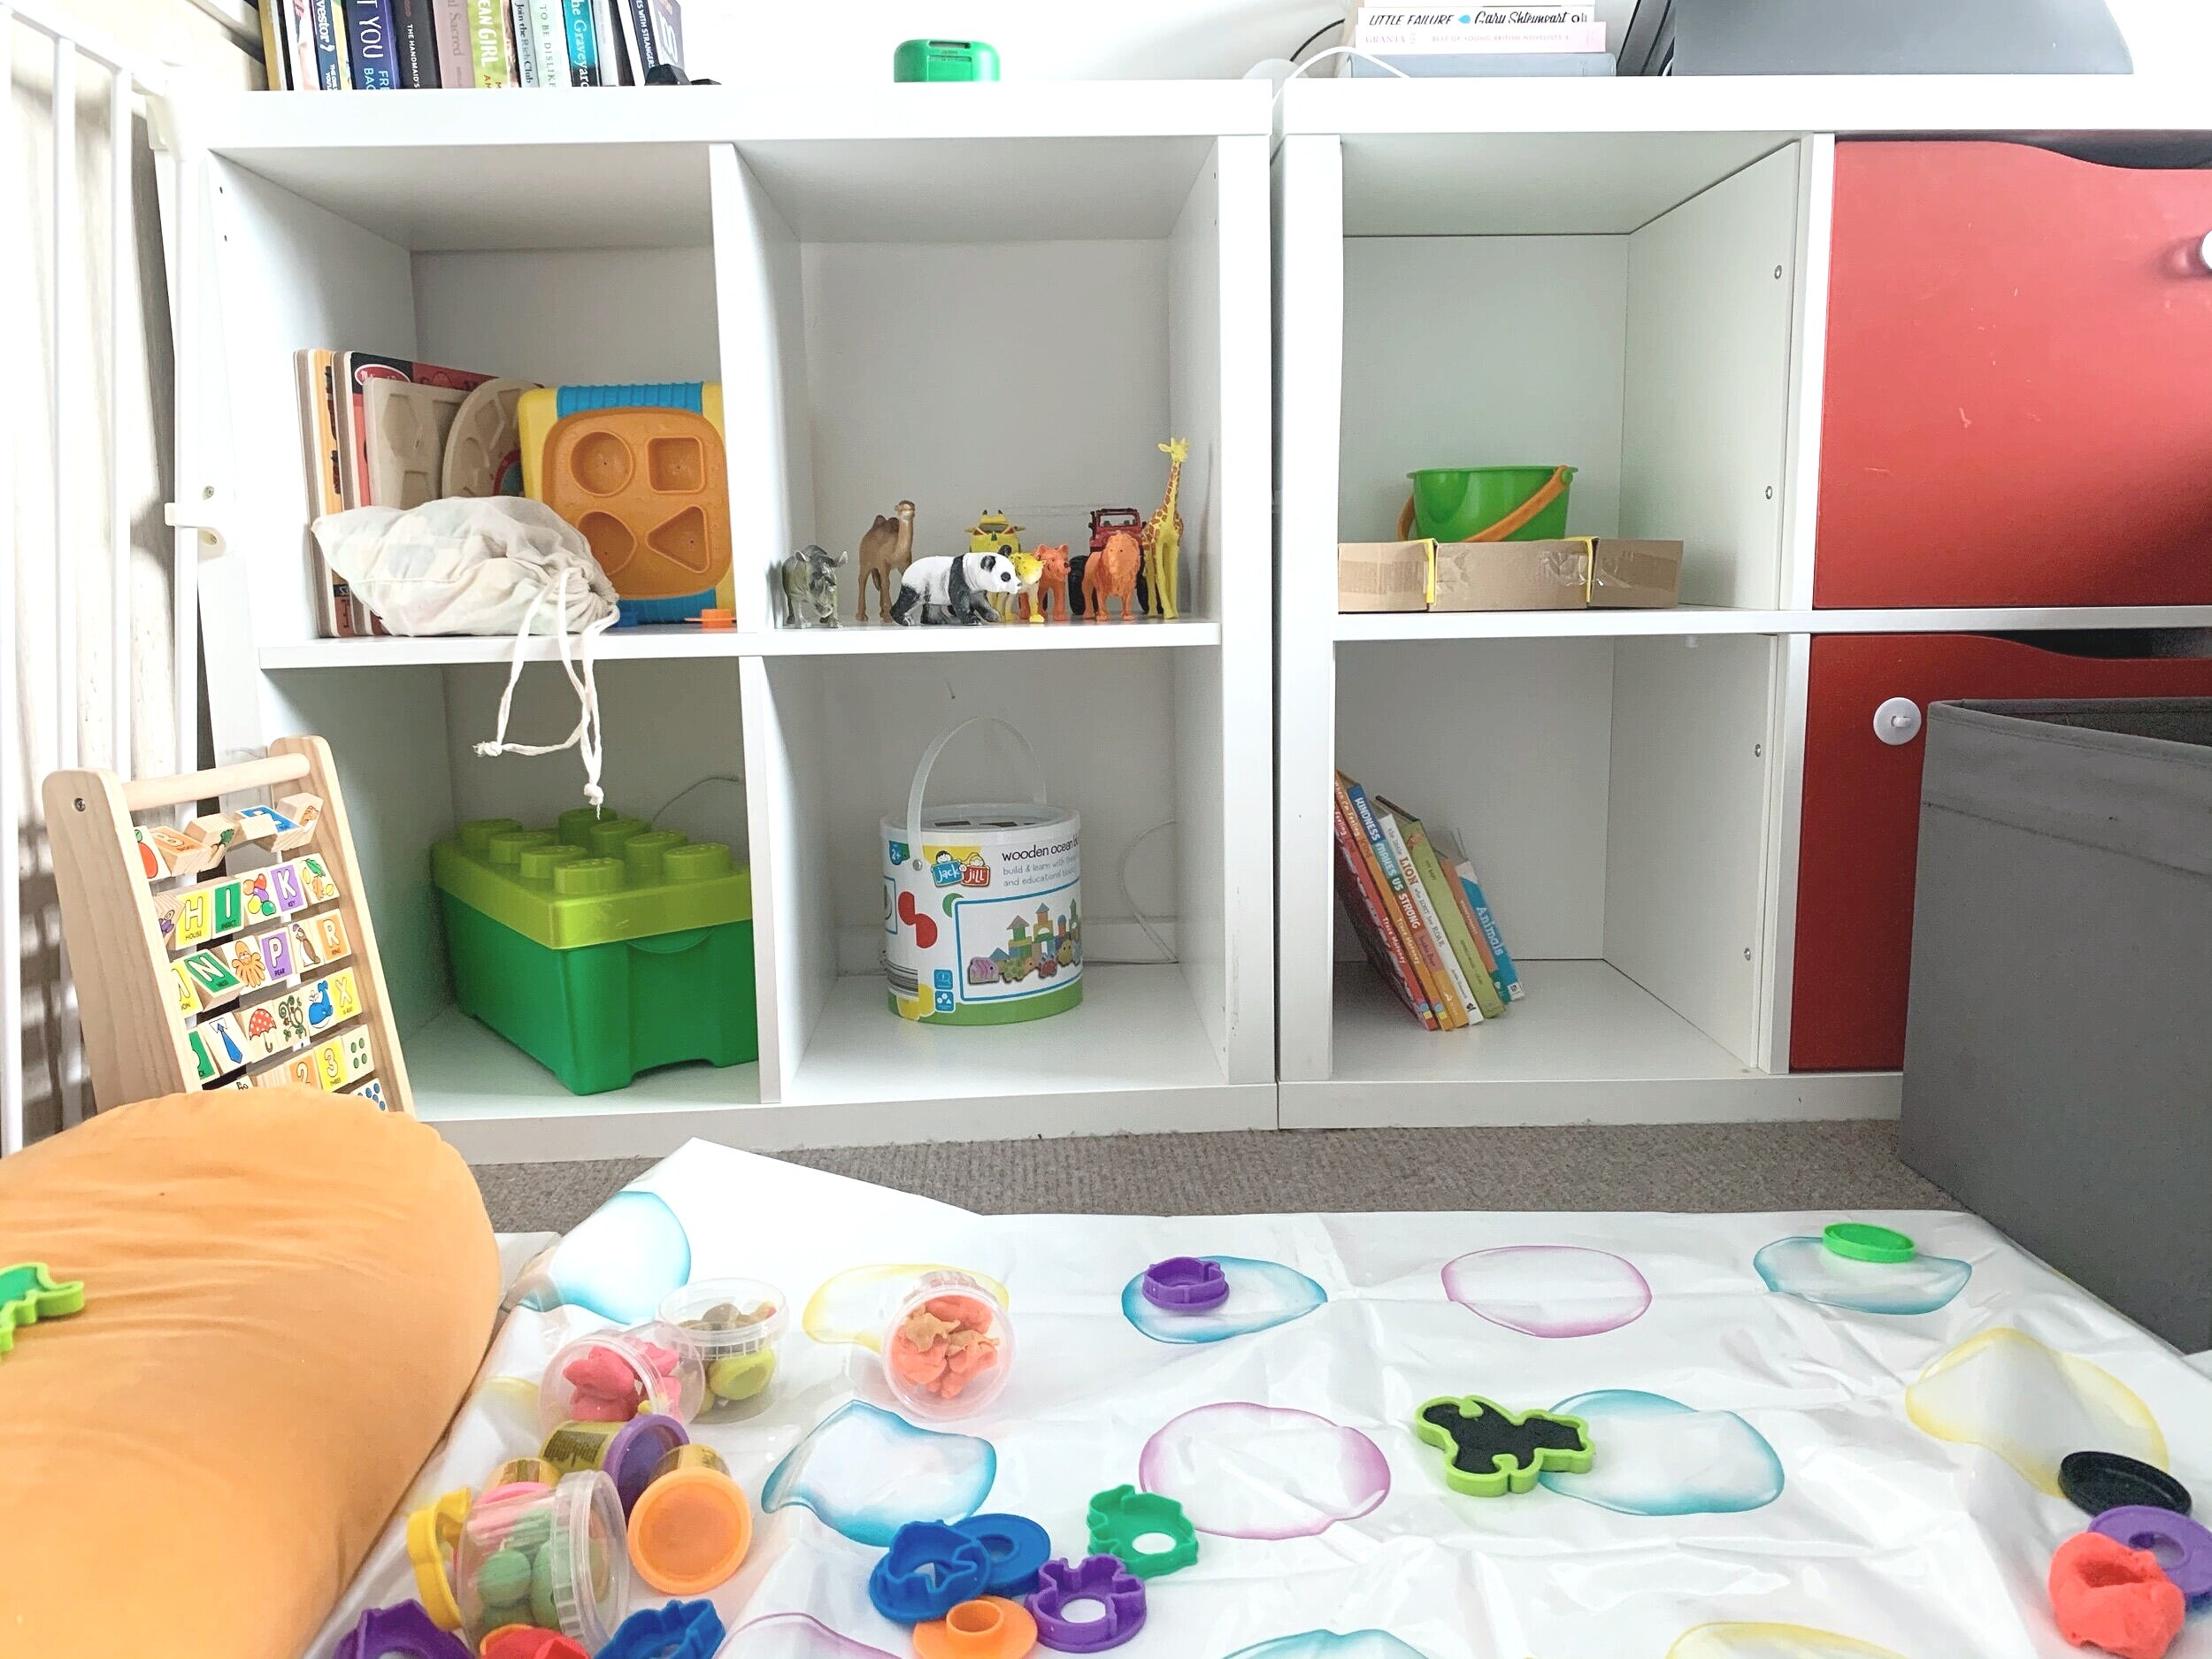
This is the first setup I did of Kimi’s shelves. I did this roughly 2 months ago when I started reading about the different teaching methods (eg. Montessori, Waldorf) It is not much but the effect that organising his shelves had on me was tremendous. I felt very happy and pleased with this!
Starting from left to right, top to bottom, I will walk you through the toys and activities I placed here.
CUBE 1: Cube 1 has 4 different wooden puzzle boards and 1 plastic cube puzzle. All of the pieces are placed in a reusable drawstring bag. I did this because Kimi already find these puzzles easy. So instead of buying new puzzles immediately, whenever Kimi wanted to do the puzzles, I just pull out all of the puzzle boards, lay them down on the floor, ask him to pick a piece in the drawstring bag and he will then place the piece in the right place.
CUBE 2: During this time, Kimi only has two sets of toy animals. One set is these zoo animals and the second set is his dinosaurs which was in storage when I took this picture. At the back of the zoo animals are his monster trucks which he plays quite a lot.
CUBE 3: Play dough was the only art material that he had when I took this. As you can see, since I was just starting out, I did not have proper containers for them yet. I just reused the green bucket I got from his set of sand tools to hold his play dough tools (which were all on the playmat in this photo) and I placed the play dough tubs in this carton inset where the play dough originally came in.
CUBE 4: Lego/Duplo blocks; CUBE 5: Small wooden blocks and a shape sorter; CUBE 6: Books
The gray storage box on the floor held his stuffed toys.
This is two weeks after the first shelf setup I did.
I removed my books on top to make this shelf solely dedicated for Kimi’s activities. I also removed the 2 red doors of the cubes at the rightmost and removed as well the things that were inside them to make way for these 2 gray containers that hold Kimi’s stuffed toys and battery-operated toys. I also bought containers and baskets.
I also added in some art materials and a train track.
CUBE 1: These are the magnetic wooden blocks that came with his wooden blocks set. I set up the cute, wooden sea creatures on top of his blue play silk as if they are in water and also to give him some inspiration on how he can expand the use of his play silks. To tell you the truth, he did not like the setup at all! Lesson learned for me!
CUBE 2: I transferred the wooden blocks that was in Cube 5 before to these 2 gray containers. I also retained the white, plastic top from the carton container so that he can still sort the wooden blocks.
CUBE 3: I am trying to expand his art materials so I bought a watercolor set for Kimi and some oil paint sticks.
CUBE 4: The Lego/Duplo is still here; CUBE 5: A sound puzzle and a magnifying glass; CUBE 6: Dinosaurs
I initially thought that setting up a shelf is a one-time thing but as time progressed, I discovered that it is a continuous process. Setting up a shelf requires a lot of planning and observing. Observing what activity is your child interested in, what kinds of movement he make? What does he usually look at?
Does she dance when there is music playing?
Does he stop when he hears something?
Does she like to post things?
Does he like to climb, jump, run or slide?
Does she try to spell out all the words she sees?
Does he sing?
Does she examine minute details?
Does he doodle whenever he sees a moist glass?
Is she trying to help whenever you are doing your laundry, vacuuming, cleaning, folding your laundry or cooking?
Does he like to build things?
If you said yes to any of those or completely said yes to all of the above, it is now our job as parents to translate those observations to activities where our child can exercise these movements and to prepare the environment to assist these interests.
There is no definite timeframe as well of how long do the toys need to be out in the shelf. Some of Kimi’s toys are out for just a few days while some of them are out for more than a month now. There are also times where I thought that he will enjoy an activity but then found them untouched or dumped on the floor.
It really depends. I just need to always keep my eyes open, sit with my child if possible, connect with him and observe as much as I can. It also helps to jot down ideas and observations that pop up in a notebook or in my phone so that I won’t find myself scrambling for that idea when the need arises.
I am sure that it would be overwhelming especially if you are new to this. I was in the same position months ago and I still get overwhelmed. As I built a plan and observed more, my confidence in the process also grew. I promise you that it gets easier, especially if I see my child having fun with what I have prepared. It is totally worth it.
I will be posting regularly here improvements with our shelf organisation and toy rotation! Excited to share with you some updates soon!


